
How Do I Audit a Vendor Invoice?
If you are subscribed to the Audit tier of Discovery, you are granted access to a powerful set of features to help ensure Vendor Invoice billing accuracy. Once an Extracted Vendor Invoice is processed into a Vendor Invoice it can then be audited and revised based on the contractual information contained on the Vendor Contract.
A Vendor Invoice under audit will flow through the following essential steps:
If the totals do not match after allocation, the invoice shows Invalid Allocation instead of Allocated. Depending on your setup, an invoice can also show Revenue Check Failure (Revenue tenants, when posting can’t find matching client revenue), Manually Posted (tenants without an accounting integration) or Paid (QuickBooks Online, once the bill is paid). See Vendor Invoices for what each status means.
Each stage of invoice progression through Matched, Allocated and Audited focuses on key aspects of the vendor invoice as it pertains to the current Vendor Contract. We'll begin with the first progression point: Matched.
Watch this video to learn more!
Matched
When an Extracted Vendor Invoice is processed, a new Vendor Invoice record will be generated. During the processing phase, Discovery will attempt analyze every line item on the Extracted Invoice (that hasn't been marked as exclude from processing), assign a type to it, and match it to a corresponding Service and Vendor Fee. The finished result will be a new Vendor Invoice with many Vendor Invoice Line Items attached to it.
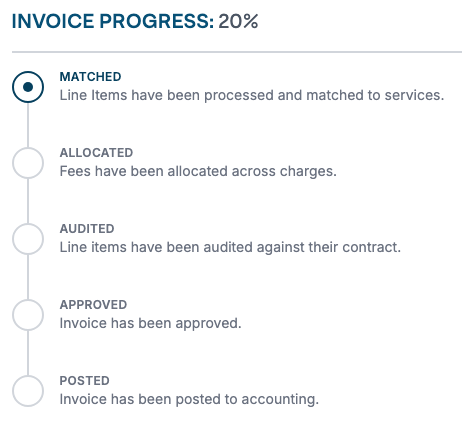
Discovery will attempt to do everything possible in order to correctly assign a type to your Vendor Invoice Line Items and associate them with the correct Service and Vendor Fees. In some cases this will not always be possible and in all cases it will depend on how much Vendor Contract and Service level information has been provided for the Services being charged on the invoice.
During this step, you may need to manually adjust the type and Service associated with some of the line items on your invoice.
In order for a Vendor Invoice to reach Allocated status, every line on the Vendor Invoice must meet the following criteria:
- All Base Charges must be assigned to an active Service that is configured with base charge pricing for the given Fiscal Period that the invoice date falls within. This includes Commercial, Doorstep, and Rental services, as well as any custom service type that has base charge pricing enabled.
- All Per Occurrence and Per Unit Service Charges must be assigned to an active Service that is configured with per occurrence or per unit pricing for the given Fiscal Period that the invoice date falls within. This includes Rolloff services, as well as any custom service type that has per occurrence or per unit pricing enabled.
- All Extraneous Charges must be assigned to an active Service of any type.
- All Allocatable Service Fees must be assigned to an active Service of any type.
The Vendor Invoice Line Items that need attention will have a type prefixed with "Incomplete." This indicates that the system was unable to automatically identify a matching Service, but the charge type is known. Until these are resolved, you will not be able to transition the Vendor Invoice to Allocated status.
Watch this video to learn about line item bulk assignment!
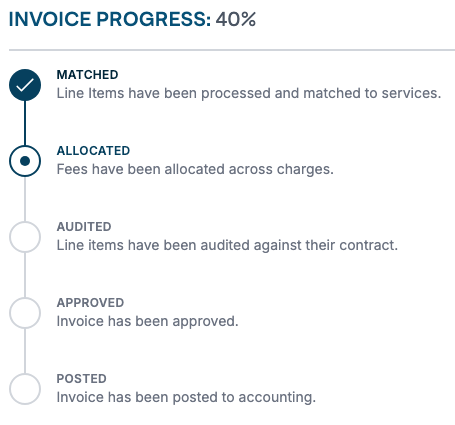
Allocated
You can allocate a Vendor Invoice only when all of these are true:
- No line items are incomplete.
- The line item total, not counting Extra Data lines, equals the invoice's Total Current Charges.
- Every Allocatable Fee is matched to a Vendor Fee.
During allocation, Allocated Values will be generated for each of the Service Charges (Rolloff, Commercial, and Extraneous Charges) on the Vendor Invoice.
Sales Taxes
Should you discover any line items with erroneously applied and allocated Sales Taxes, you can use this opportunity to designate them as taxable or non-taxable.
Changing a line item's taxability status will only affect how taxes are allocated. It will not adjust the tax line item total. Once the taxability changes are applied, the allocation of sales tax will be adjusted accordingly.
To learn more about this process, please see the How Do I Adjust Sales Tax Allocation on a Vendor Invoice article.
Invalid Allocation
After allocation, the charges' All in Costs should add up to the invoice's Total Current Charges. When they do not, Discovery sets the invoice to Invalid Allocation instead of Allocated. This stops an invoice whose numbers do not add up from being audited.
The invoice page shows Fees and taxes have not been allocated across charges, but the invoice totals do not match and opens the Allocated Values and Sales Taxes panels so you can see where the difference is. To fix it, either:
- Change which line items are taxable. Discovery recalculates, and the invoice moves to Allocated once the totals match.
- Correct the line items, then click the Invalid Allocation step to allocate again.
An invoice in Invalid Allocation cannot move straight to Audited.
Audited
Once Discovery has Allocated Values for your Service Charges, it audits each Service Charge against the vendor rates on its Service, and audits the Allocatable Fees against the fees on your Vendor Contract. When a charge is billed above what you've set up, Discovery adjusts it on the Vendor Invoice and the Adjusted Total Current Charges updates. If an adjustment looks wrong, check the rates on the Service.
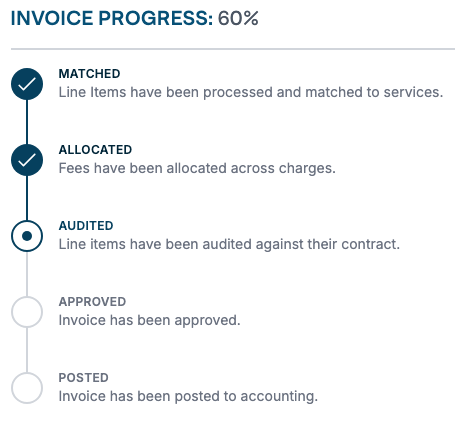
If during the Audit process any adjustments are made, they'll be indicated by a strikethrough, accompanied by the newly adjusted amount highlighted in green to the right.

In addition, if any of the adjusted line items are taxable, the associated Sales Tax line items will be recalculated and adjusted accordingly.

Approved
You can use the Vendor Invoice Status controls to approve your Vendor Invoice. During the approval process, Billable Expenses are created. A Billable Expense is a vendor charge you can pass on to your client. Which charges get one depends on each Service's billing settings. If a charge you expected to bill has no Billable Expense, check the Service's Client Billing Frequency and Is Pass Through? settings.
Billable Expenses on pass-through Services start as Ready to Bill. All others start as Needs Markup and must be marked up before they can go on a client invoice.
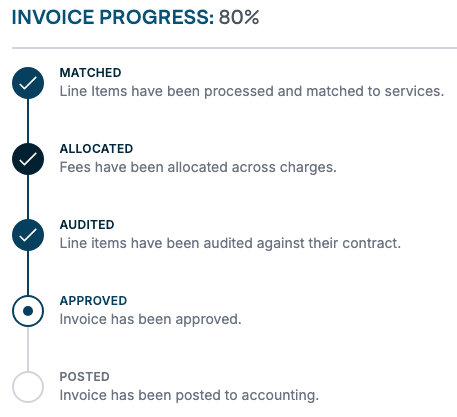
A Vendor Invoice can be transitioned back to “Audited” (unapproved) until either of these happens:
- It’s posted, either to QuickBooks or manually.
- Its billable expenses are on a client invoice that’s been approved or sent, or on a credit memo that’s been sent (Revenue only).
During this transition, Billable Expenses generated from the Vendor Invoice will also be removed.
Auto Approval
Discovery offers the option to Auto-Approve Vendor Invoices given certain criteria are met. Vendor Invoice Auto-Approval is not active by default and each tenant must request the feature be activated.
Learn more about Auto Approval here.
Force Approval
Discovery also supports the requirement of Force Approval of Vendor Invoices based on defined criteria. Force Approval rules can be configured at the tenant level in Settings, with the option to set Vendor Account-specific overrides when different rules are needed.
If Force Approval criteria are met, you will see a modal similar to this upon invoice approval. The modal will indicate why force approval is required.

Once you force approve an invoice, the approval reason will be logged and timestamped on the invoice.
Posted
Once a vendor invoice is approved, it can be posted:
- QuickBooks Online: posting creates a bill in QuickBooks (or a vendor credit, for a negative total). The invoice moves to Paid once the bill is paid in QuickBooks.
- QuickBooks Desktop: posting marks the invoice ready for the next .iif export to QuickBooks Desktop.
- No accounting integration: use Manually Posted to lock the invoice instead.
See How Do I Post Approved Vendor Invoices to QuickBooks? and Manually Posting Vendor Invoices.
Unposting a Vendor Invoice
If a vendor invoice has a status of Posted or Paid, you can roll it back to Approved status using the Unpost button at the top of the invoice. The button appears in place of Force Post once the invoice is posted, and only if a user with settings permissions has turned on Allow Vendor Invoice Unposting. Manually Posted invoices have their own Unpost button, available to administrators only.
See How Do I Unpost a Vendor Invoice that was Posted to QuickBooks? for more information on when and how to unpost an invoice.

If you have additional questions or need more in depth information, please feel free to send us a message using the help beacon in the lower right-hand corner.