How do I create a Vendor?
To create a new Vendor, please follow these steps as a guide:
- 1
- Click on Vendors.
- 2
-
Click on New.

- 3
-
Under Step 1, beging typing your Vendor name. A list of matching Vendors will display in the dropdown list. Selecting your Vendor here not only pre-populates Vendor information in Step 2, but also yields the best data extraction results based upon specific Vendor Invoice arrangements.

If you cannot locate your particular Vendor in the Vendor repository list, please click Skip to enter your Vendor information manually. Here, we've chosen Skip.
- 4
-
Now in Step 2, enter a Vendor Name.

- 5
-
Select a Default Weight Unit.

- 6
-
Please enter all known details for this Vendor in the Basic Info section.

- 7
-
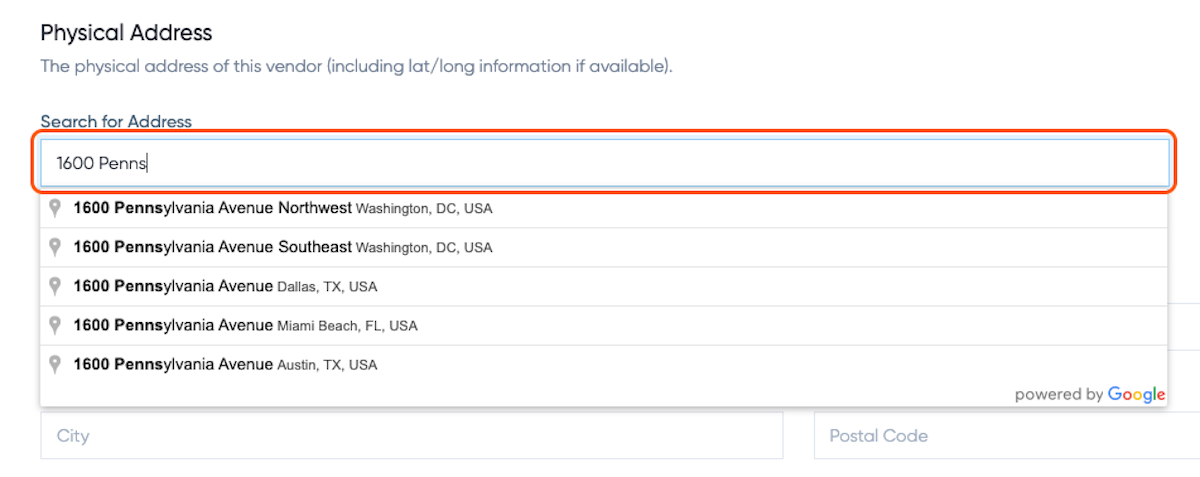
Under Physical Address, begin typing an address. A list of real world addresses will populate as choices. Choose one or enter your address information manually. P.O. Boxes cannot be used for a physical address.

- 8
- Click on Save Changes.
- 9
-
The new Vendor detail page will display. If a Certificate of Insurance exists, click on the Edit button near the upper right-hand corner. Near the bottom of the page, you can now attach a Certificate of Insurance document to this Vendor.

- 10
- Click on Save Changes.
Bulk Imports
If you have many Vendors to create, we recommend leveraging Discovery's bulk import option. Please see this article for more information on bulk importing Vendors.

If you have additional questions or need more in depth information, please feel free to send us a message using the help beacon in the lower right-hand corner.
