
How Do I Send a Client Invoice?
After your invoices have been transitioned to the Approved status, you have the flexibility to send them to your customers either individually or in a single bulk operation, based on your preference.
To utilize either the individual or bulk sending method, it's essential to first Generate Client Invoices for the relevant fiscal period and mark them as Approved. Client Invoices can be sent to your Client Companies only after these requirements are met.
Send Individually
- Click on Revenue in the navigation.
-
Click on the Invoices tab, if it isn't already selected.
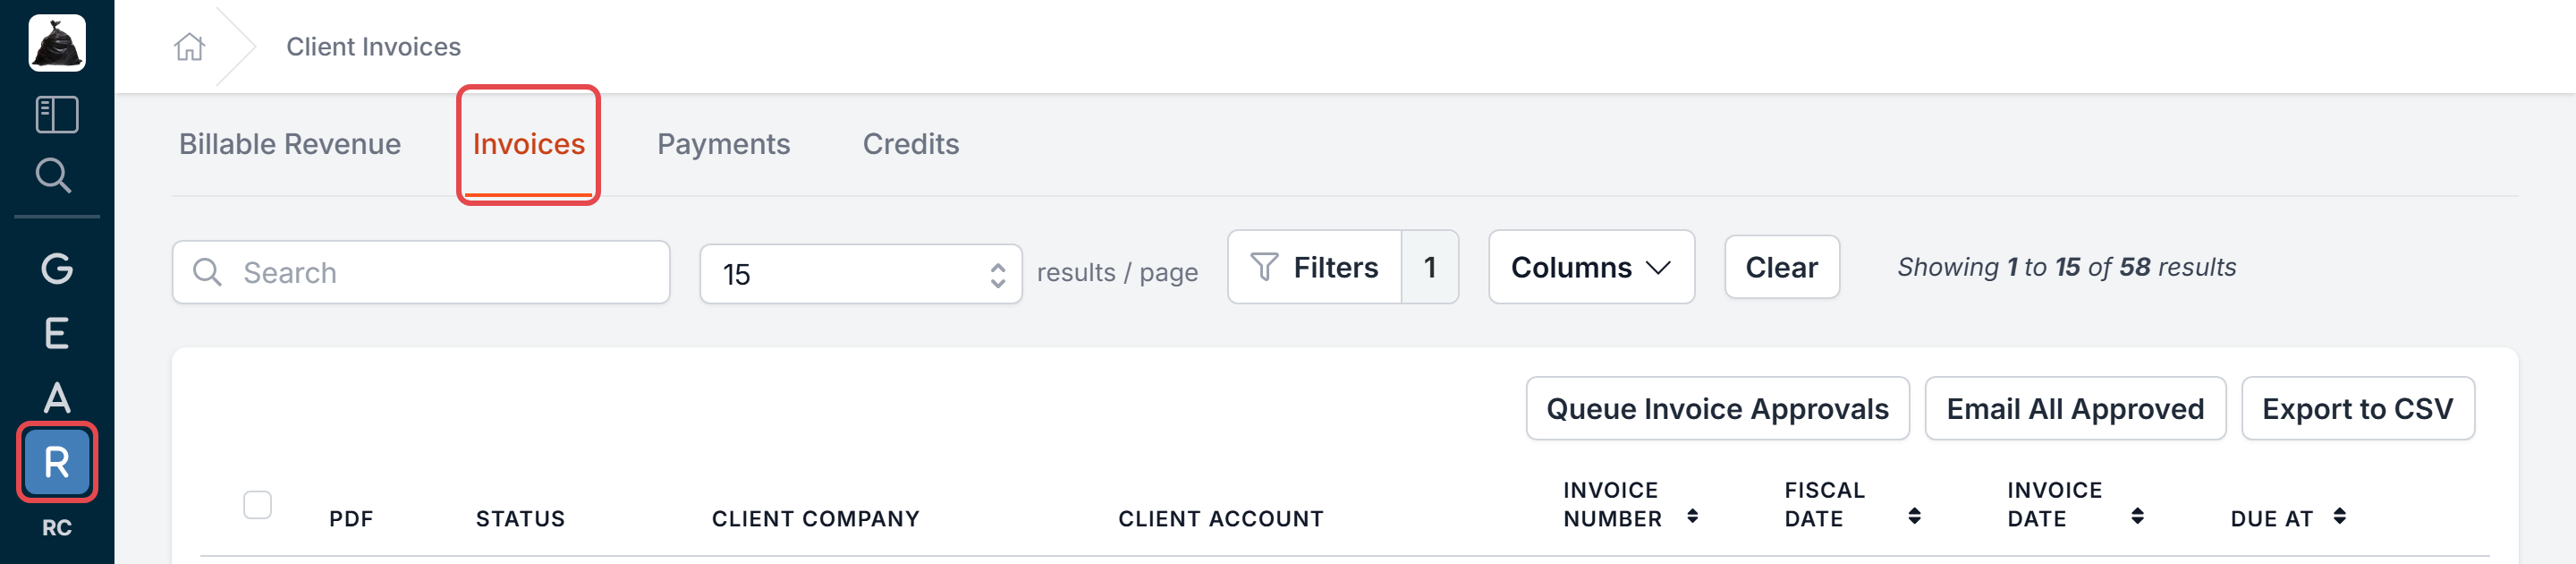
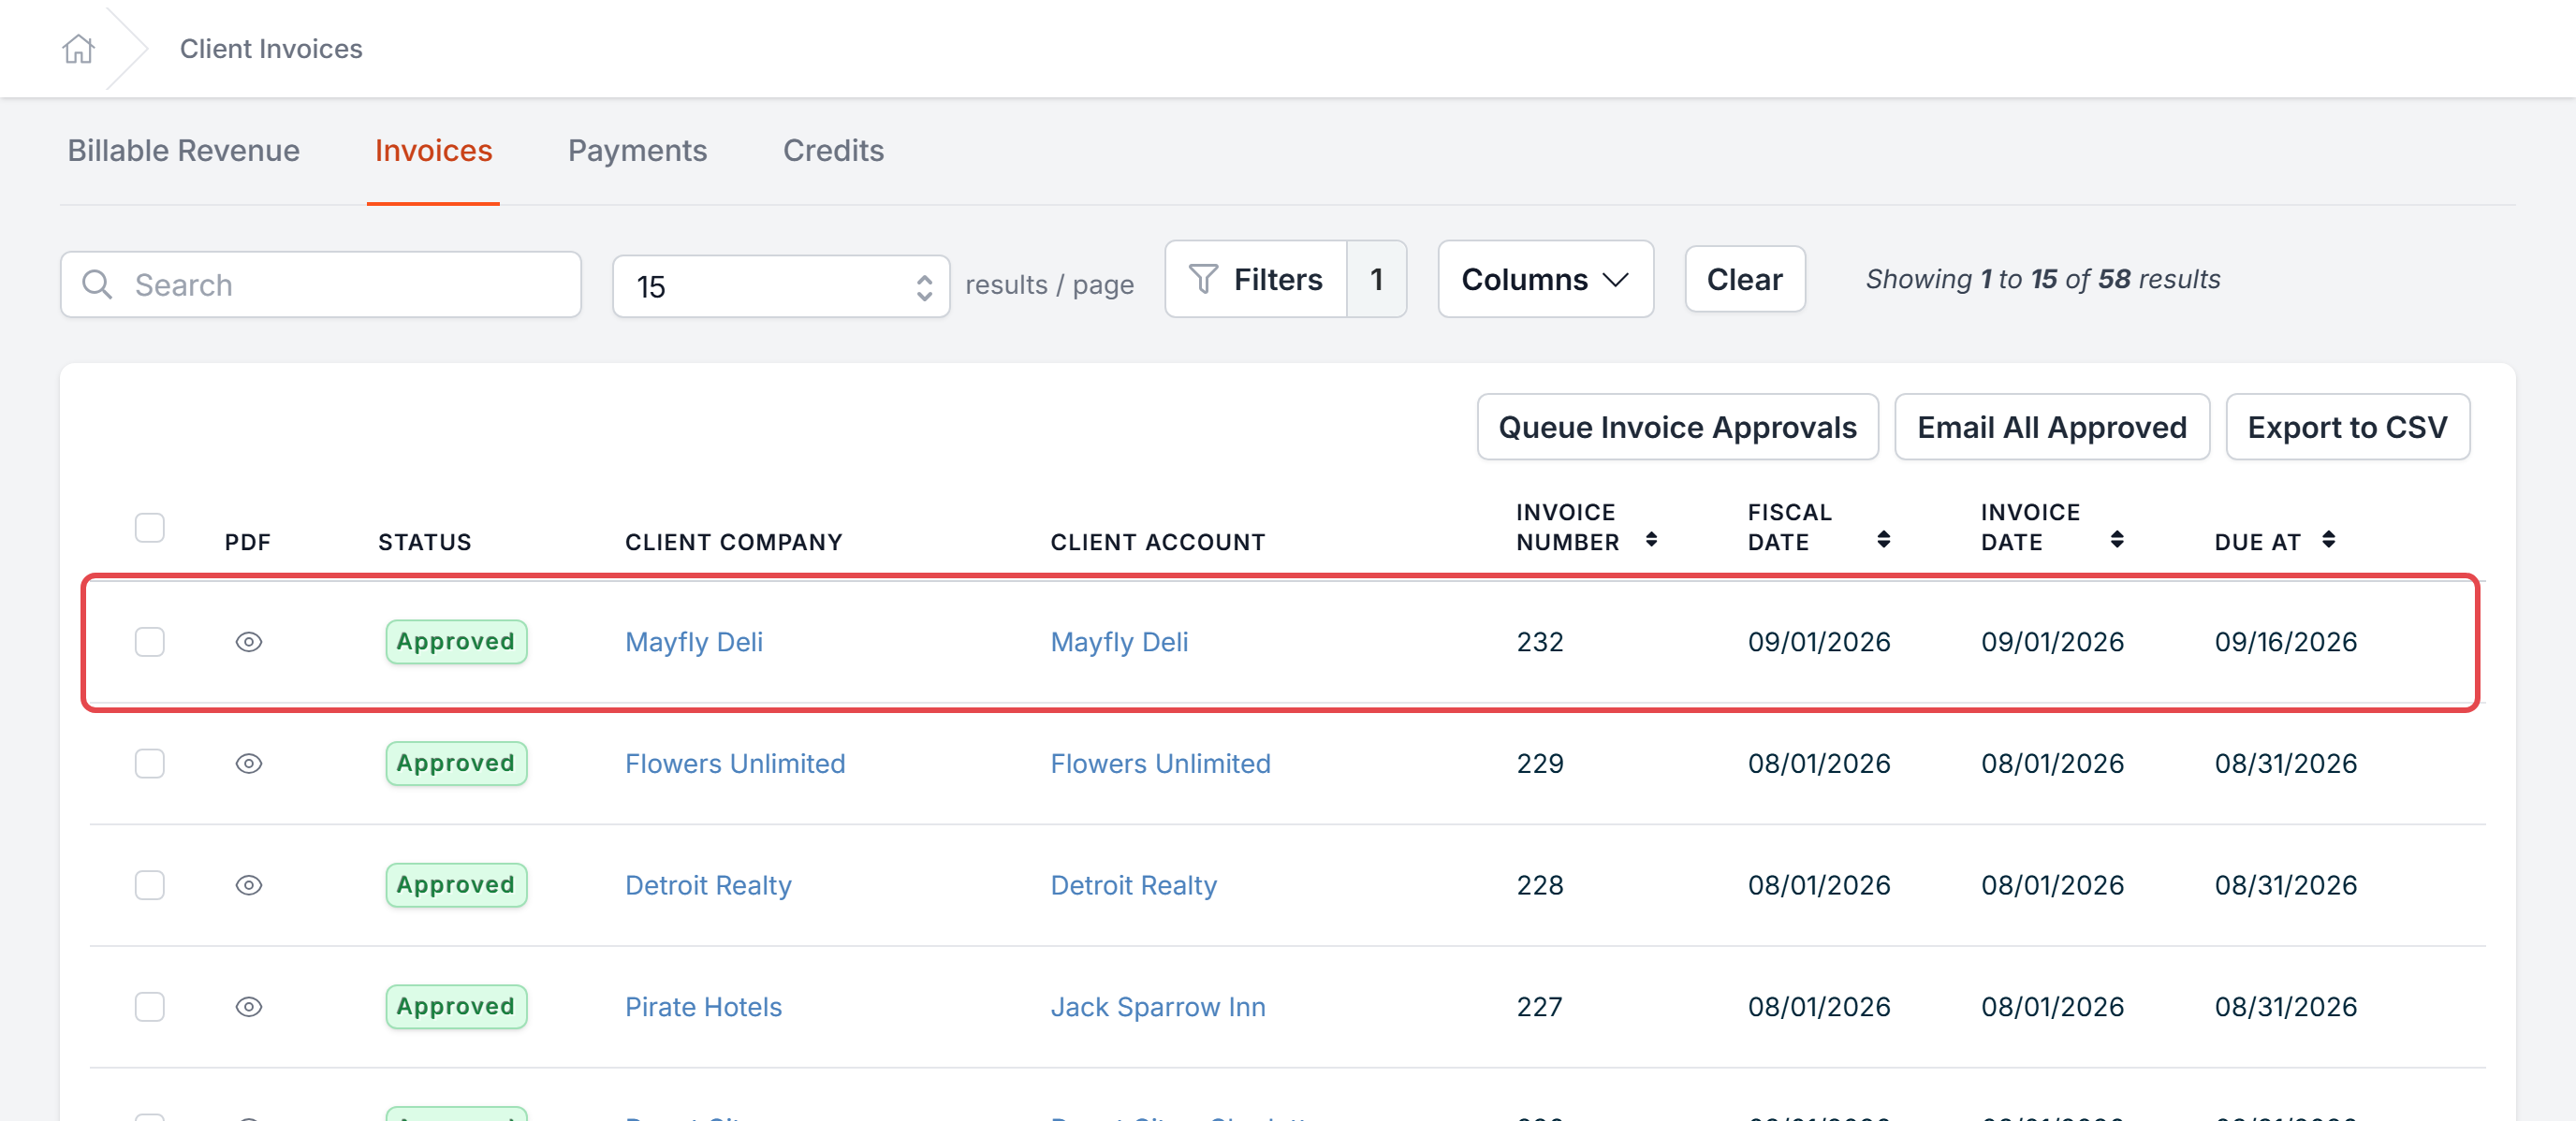
- Use the Search and Filter options to locate your target Client Invoice.
-
Click on the invoice's row to open it.
-
Click on the Email button. It appears only while the invoice is Approved.
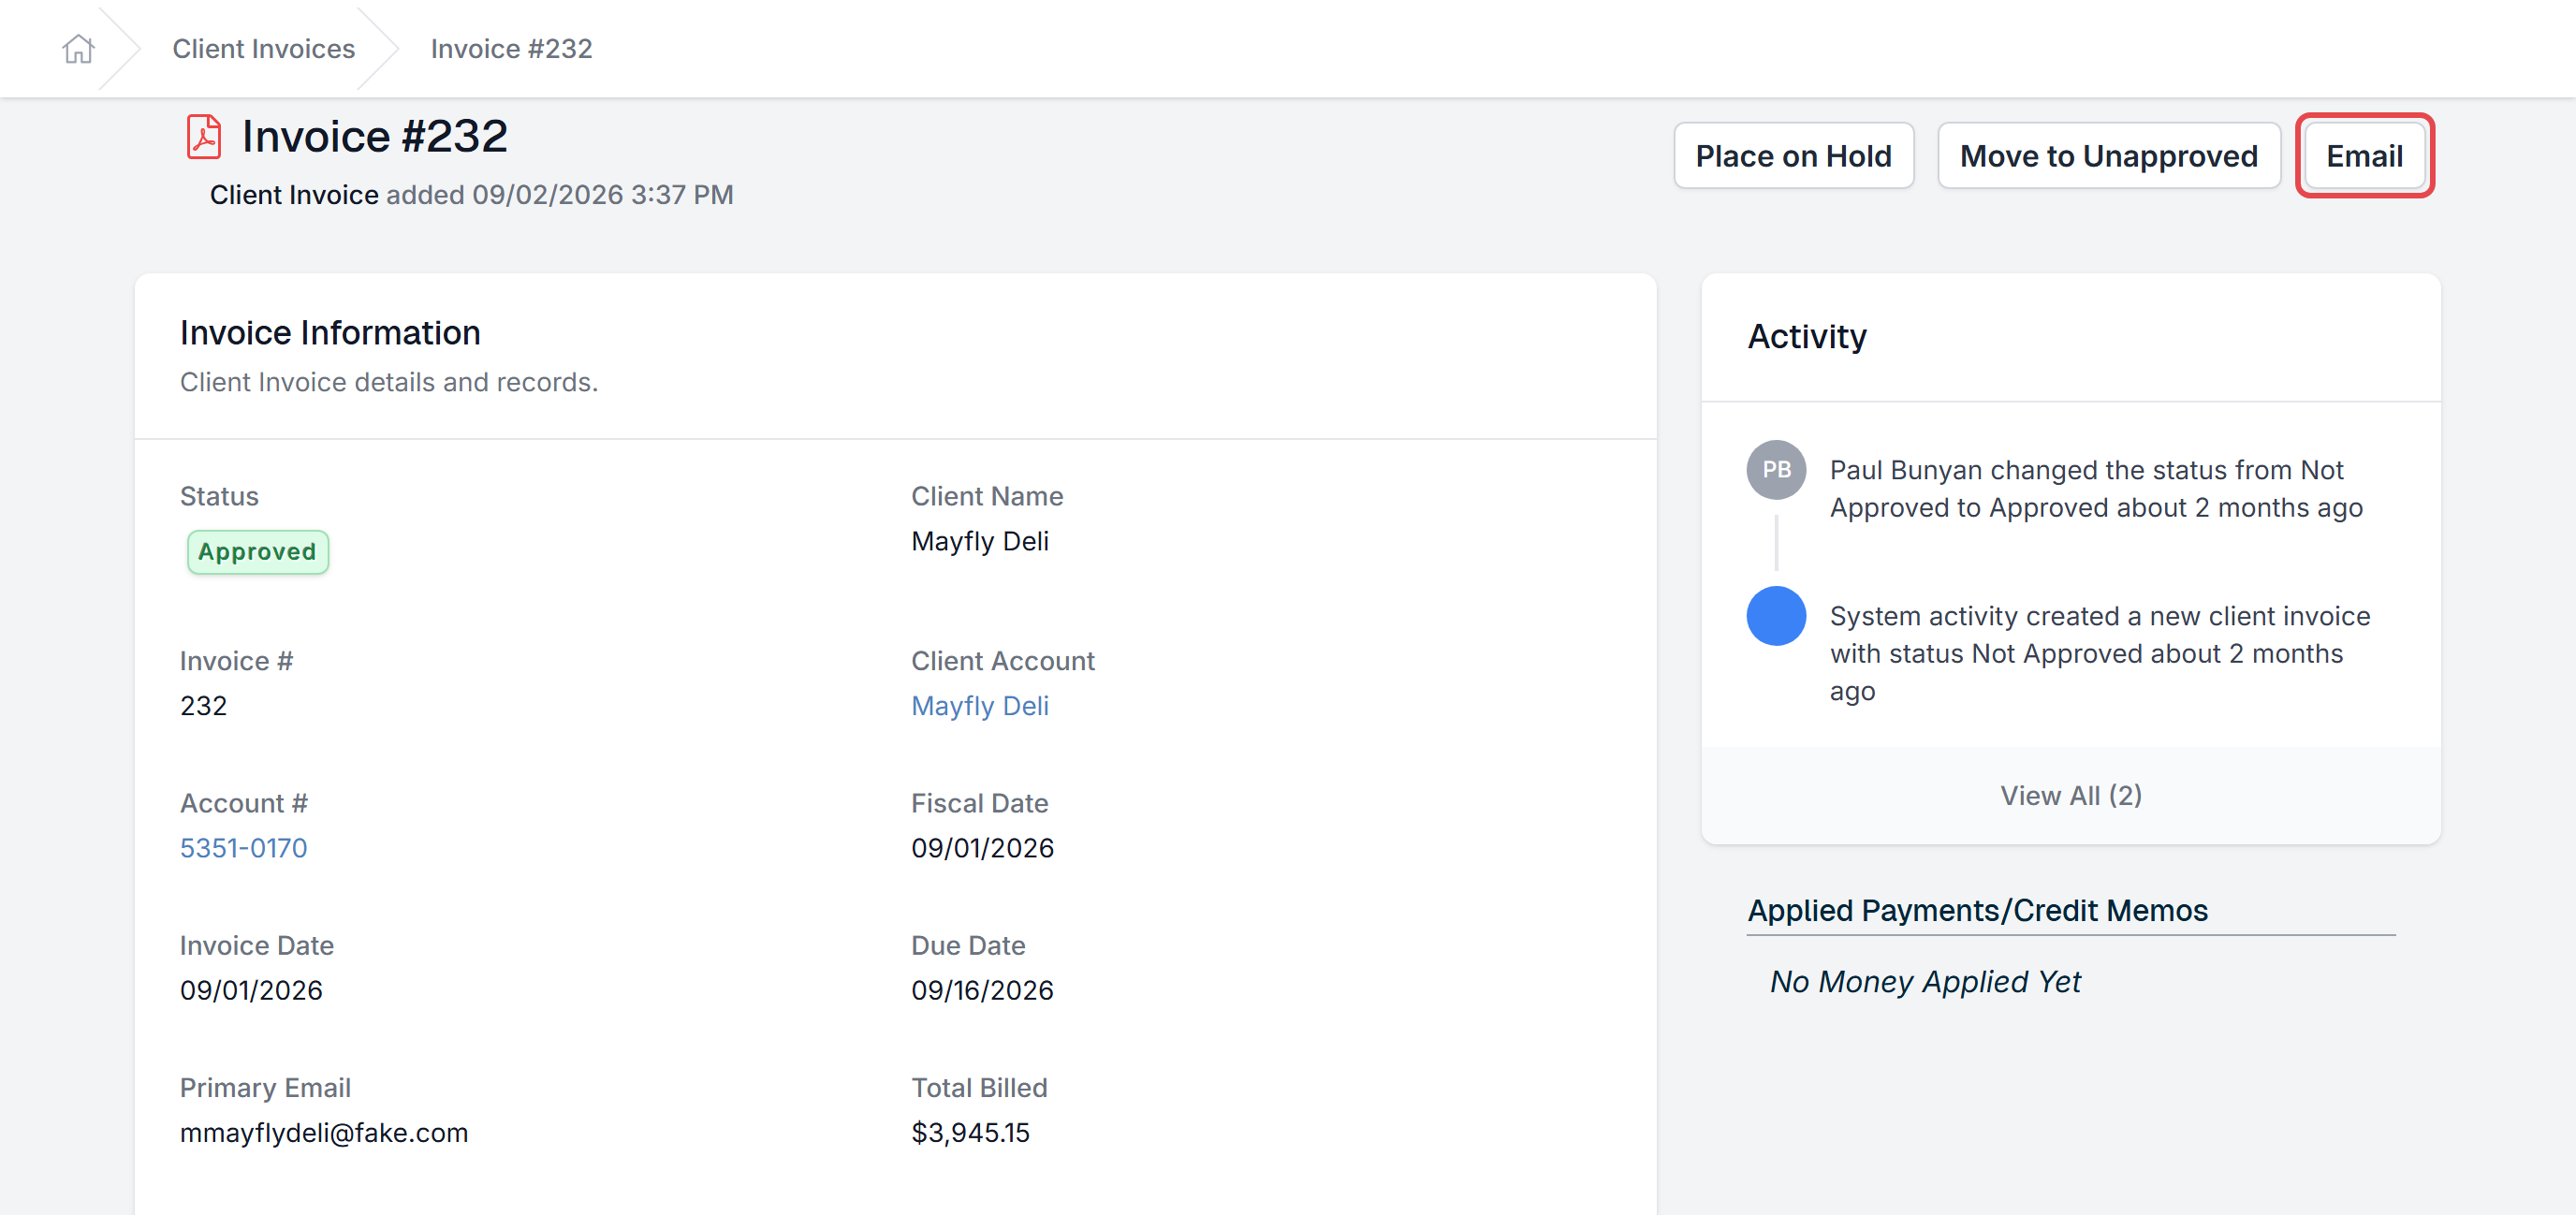
Note: When an invoice is sent, Discovery makes sure the client gets the full payment terms from the send date. If today + the client's payment terms is later than the invoice's current due date, the due date moves to that later date.
Send in Bulk
Please refer to the following video for details about Bulk Revenue Actions, including how to send a group of approved client invoices.
Send All Approved Invoices
If you prefer to send all approved invoices at once, please refer to the following instructions.
- Click on Revenue in the navigation.
-
Click on the Invoices tab, if it isn't already selected.
-
Click on the Email All Approved button.
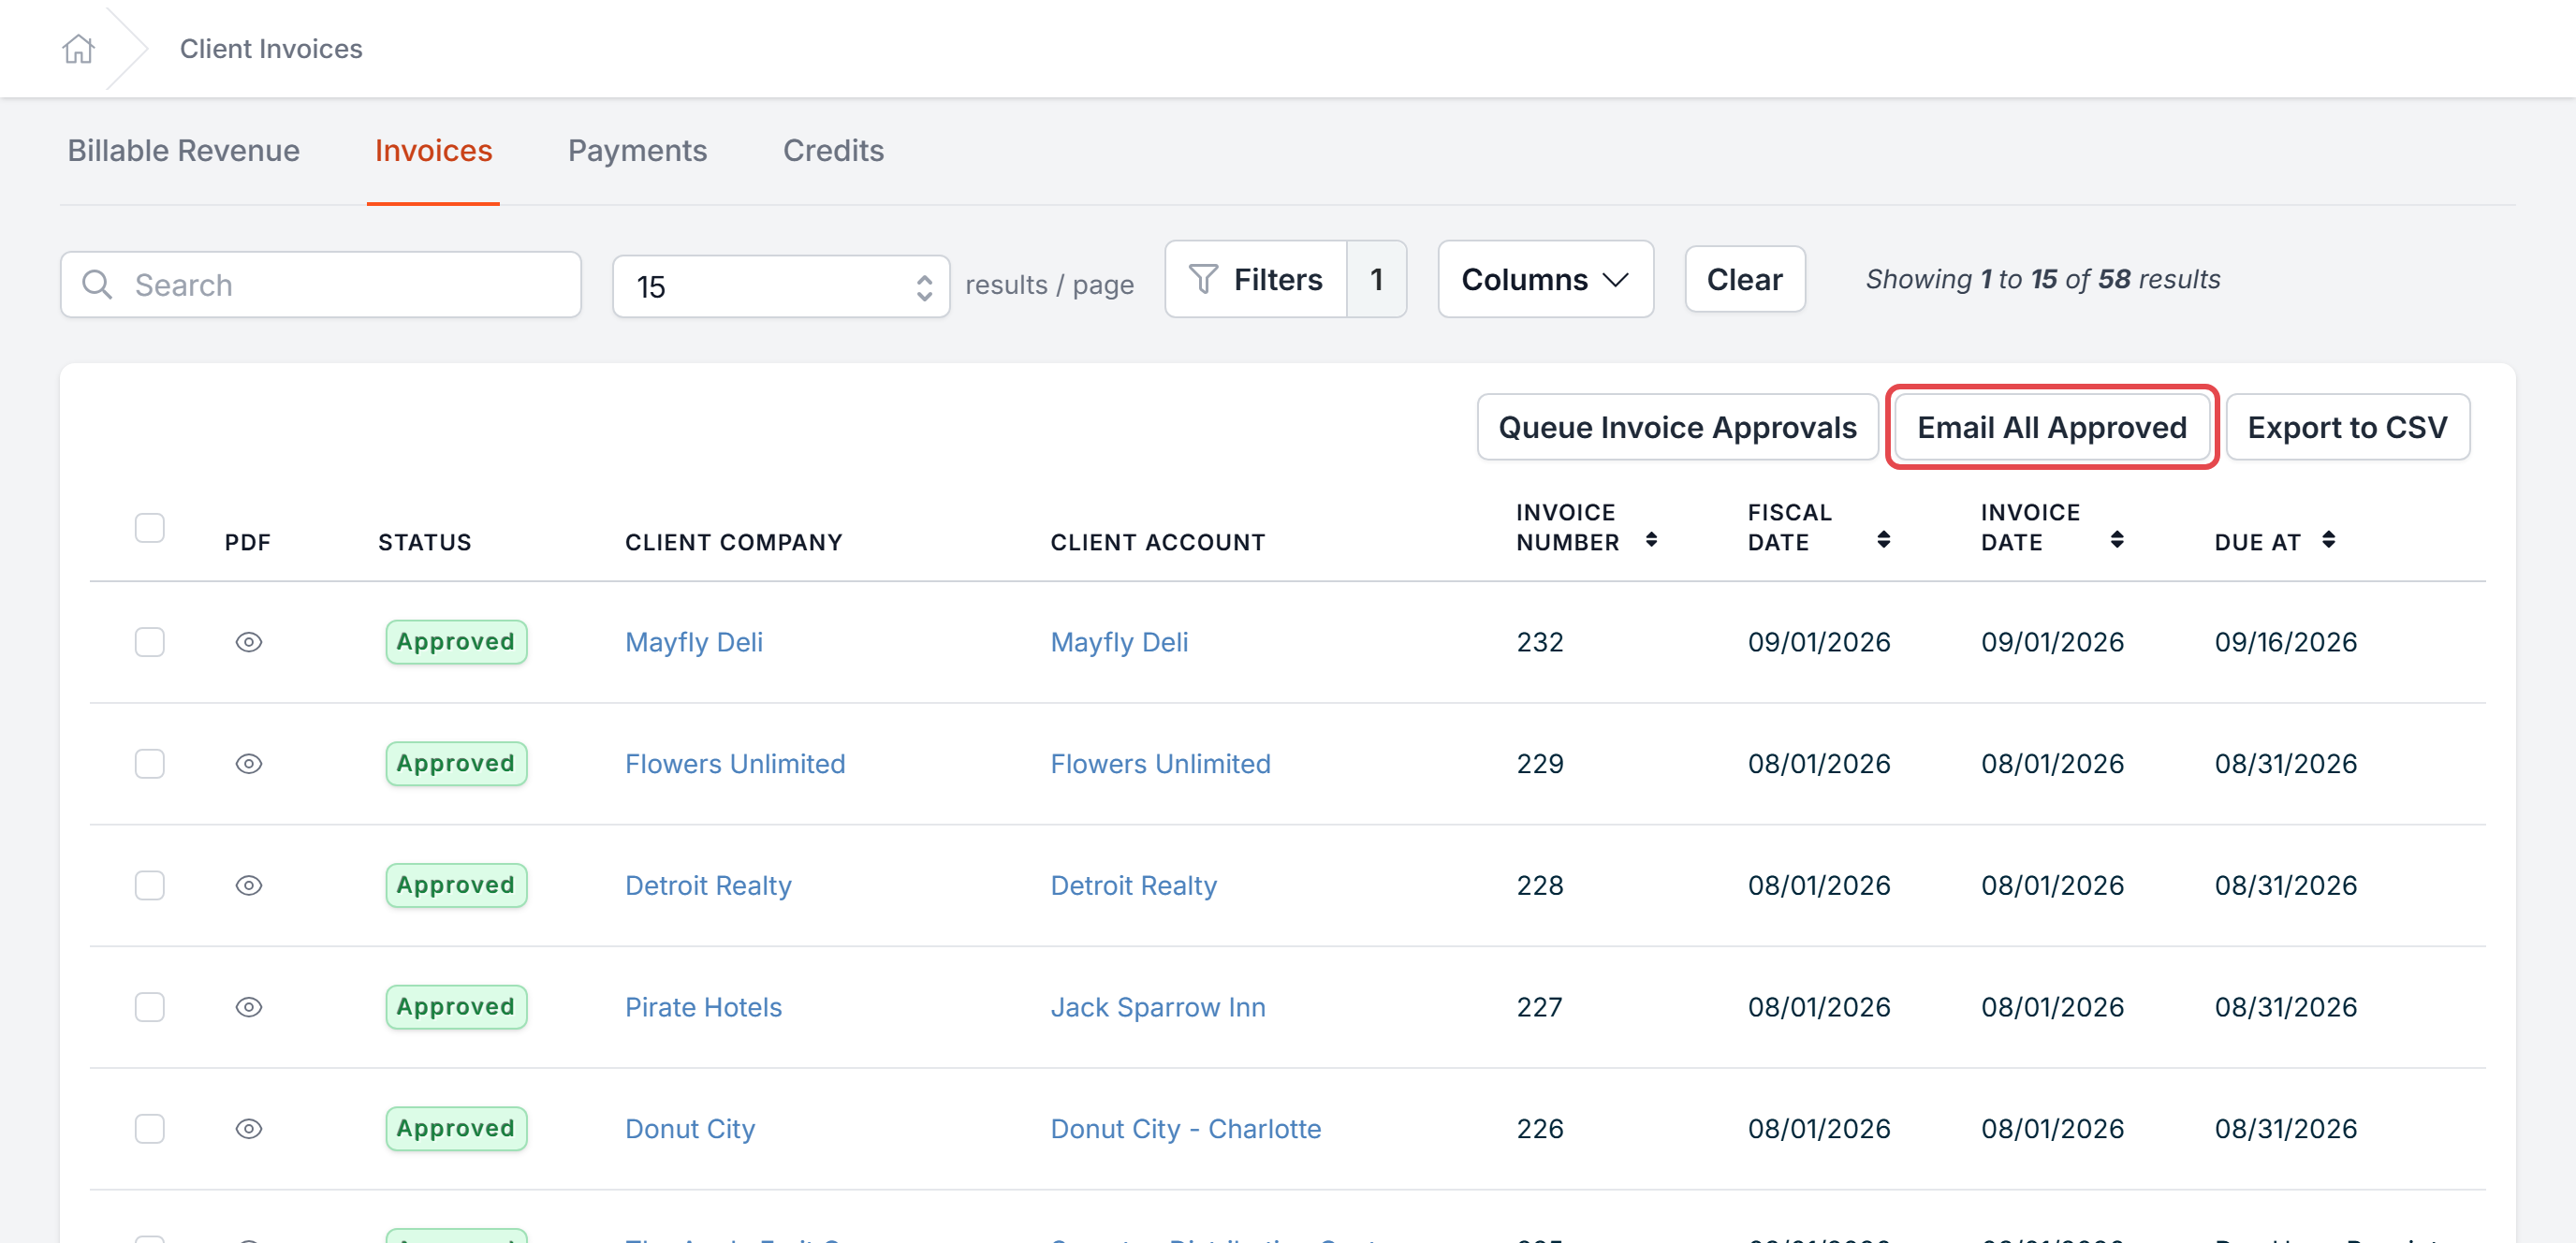
Caution: Electing to Email All Approved will send all Client Invoices that have an Approved status; not just those displayed as a result of any filters you may have in place.
What Happens in Your Accounting System When You Send
If your tenant is connected to QuickBooks, sending a client invoice also records it in your accounting system. What happens depends on your settings under Settings → Accounting → Integration.
Every invoice
- The invoice needs a primary email address. This comes from the client account unless it has been changed on the invoice.
- If Sync Quickbooks Classes is on, the invoice can't be sent while any of its classes are inactive in QuickBooks.
If an invoice doesn't meet these requirements, the Email button shows "Cannot email due to errors: …". Bulk sends and Email All Approved skip it without a message, and it stays Approved.
Sync Client Invoices With Quickbooks turned on (QuickBooks Online)
Sending the invoice creates a matching invoice in QuickBooks Online at the same moment:
- The Discovery invoice number becomes the QuickBooks invoice number.
- The invoice's due date is sent as the QuickBooks due date.
- The invoice is dated its fiscal period date. If Use Client Invoice Date When Posting is on, it's dated the invoice date instead.
- It's marked as sent in QuickBooks Online.
Before an invoice can be sent:
- Its client account must be linked to a QuickBooks customer (the External Accounting Customer field).
- It can't have sales taxes.
If QuickBooks Online rejects the invoice, it isn't sent. It stays Approved and no email goes to the client.
- Email button: you'll see an error message, usually including the reason QuickBooks gave.
- Bulk send or Email All Approved: the invoice is skipped without a message. Afterwards, look for invoices still in Approved status. The invoice page shows the reason when QuickBooks gave one.
Journal entries (all other setups, including QuickBooks Desktop)
If an Accounts Receivable GL Account is set, sending the invoice creates journal entries in Discovery for its revenue, sales tax and accounts receivable. They aren't sent to QuickBooks automatically.
- QuickBooks Online: go to Settings → Quickbooks Online and click Send Unposted Entries To Accounting System.
- QuickBooks Desktop: go to Settings → Quickbooks Desktop → Journal Entries, click Create New Export, then download the file from the Exports (iif) tab and import it into QuickBooks.
Before an invoice can be sent, every line item category on it needs a Revenue GL Account, and every sales tax on it needs a GL Account.
Example (QuickBooks Online)
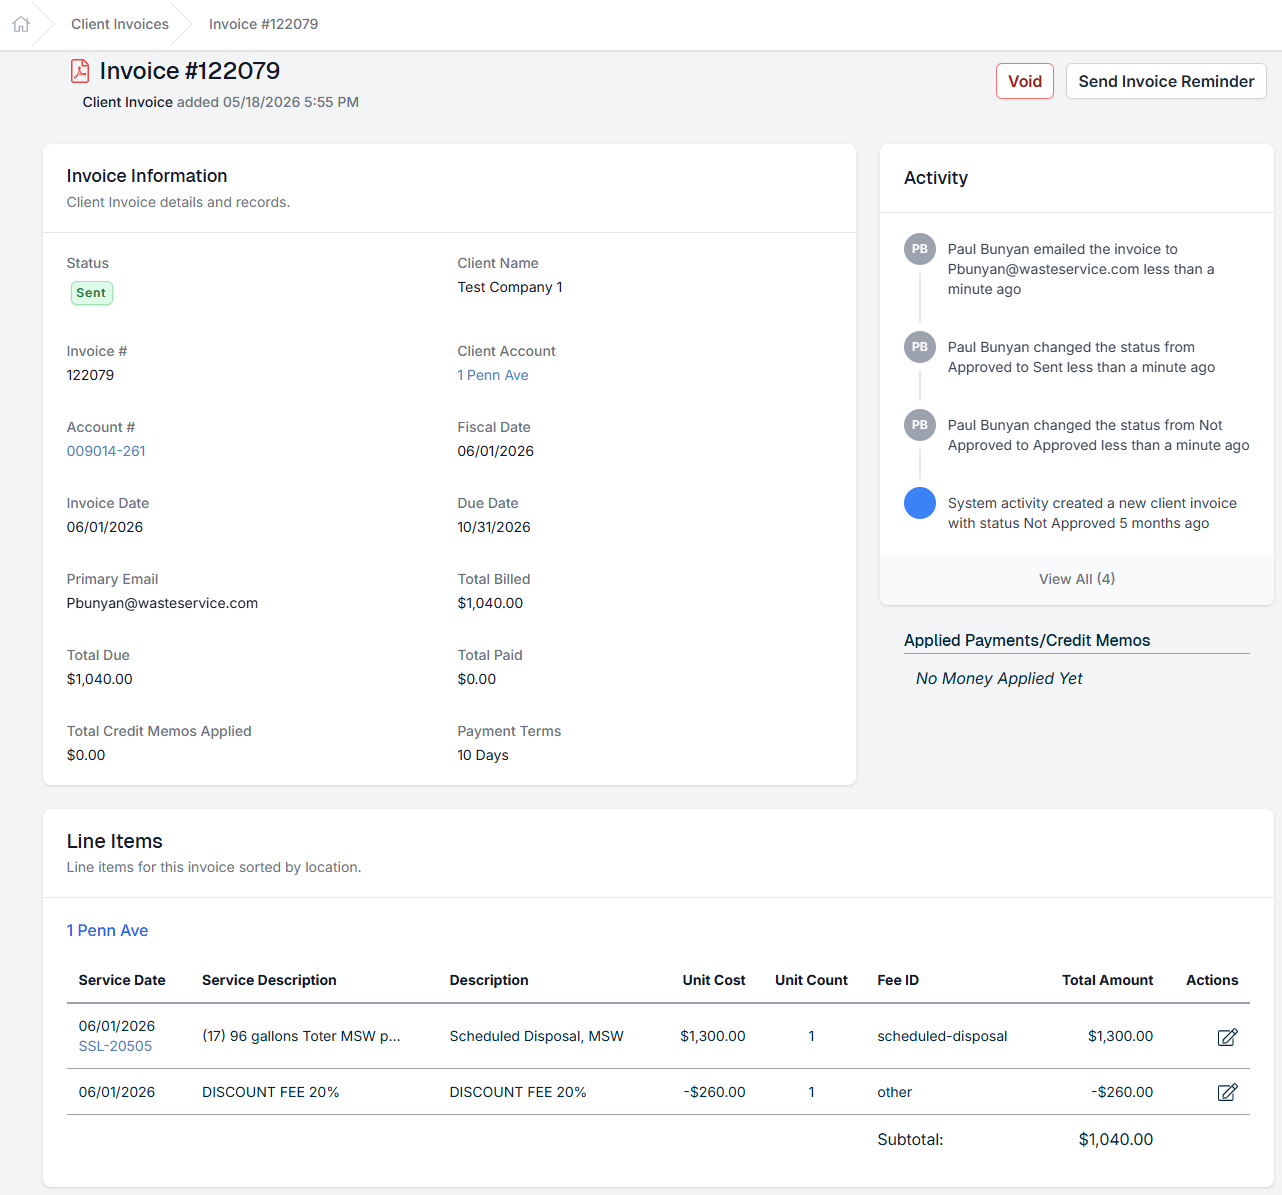
A sent client invoice with two lines: a $1,300.00 Scheduled Disposal charge and a $260.00 discount, for a total of $1,040.00. The Fee ID column shows each line's line item category.
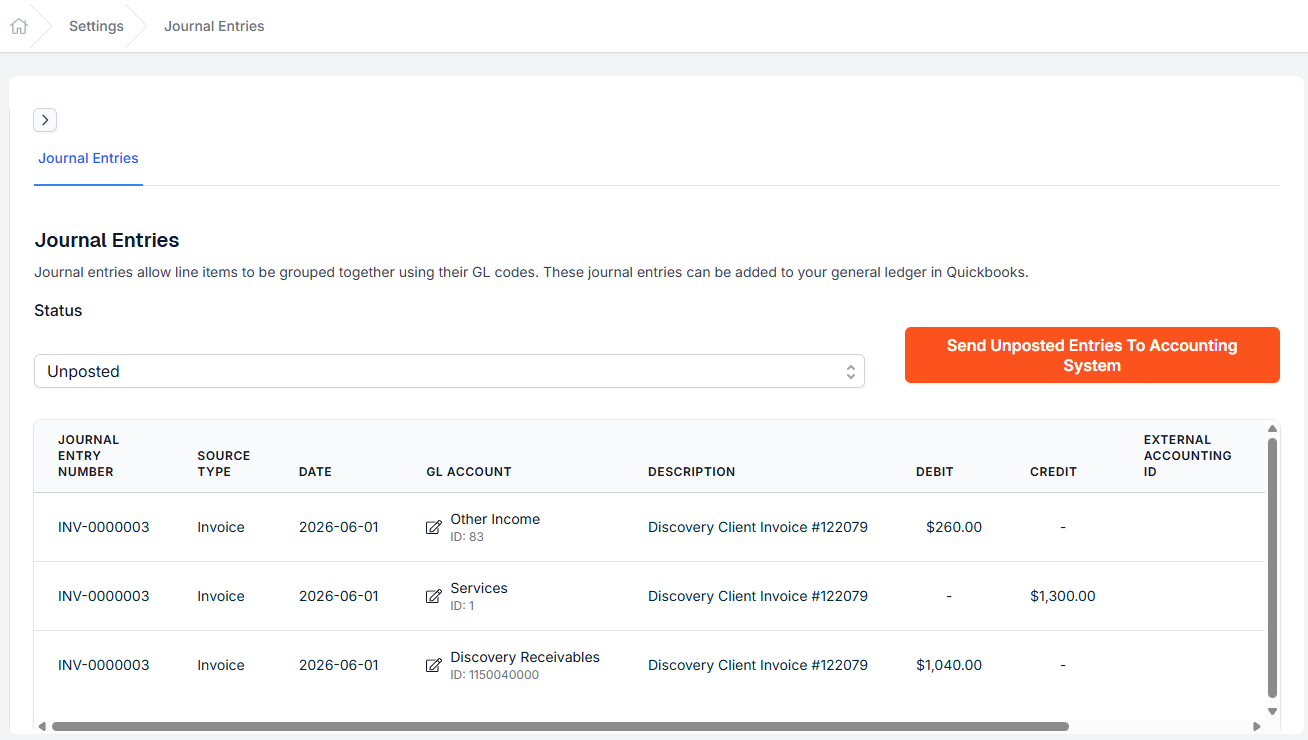
When the invoice is sent, Discovery creates journal entry INV-0000003, dated the invoice's fiscal period date. Each line item category's Revenue GL Account gets one line: $1,300.00 credited to Services, and the discount debited to Other Income. The $1,040.00 total is debited to your Accounts Receivable GL Account (Discovery Receivables).
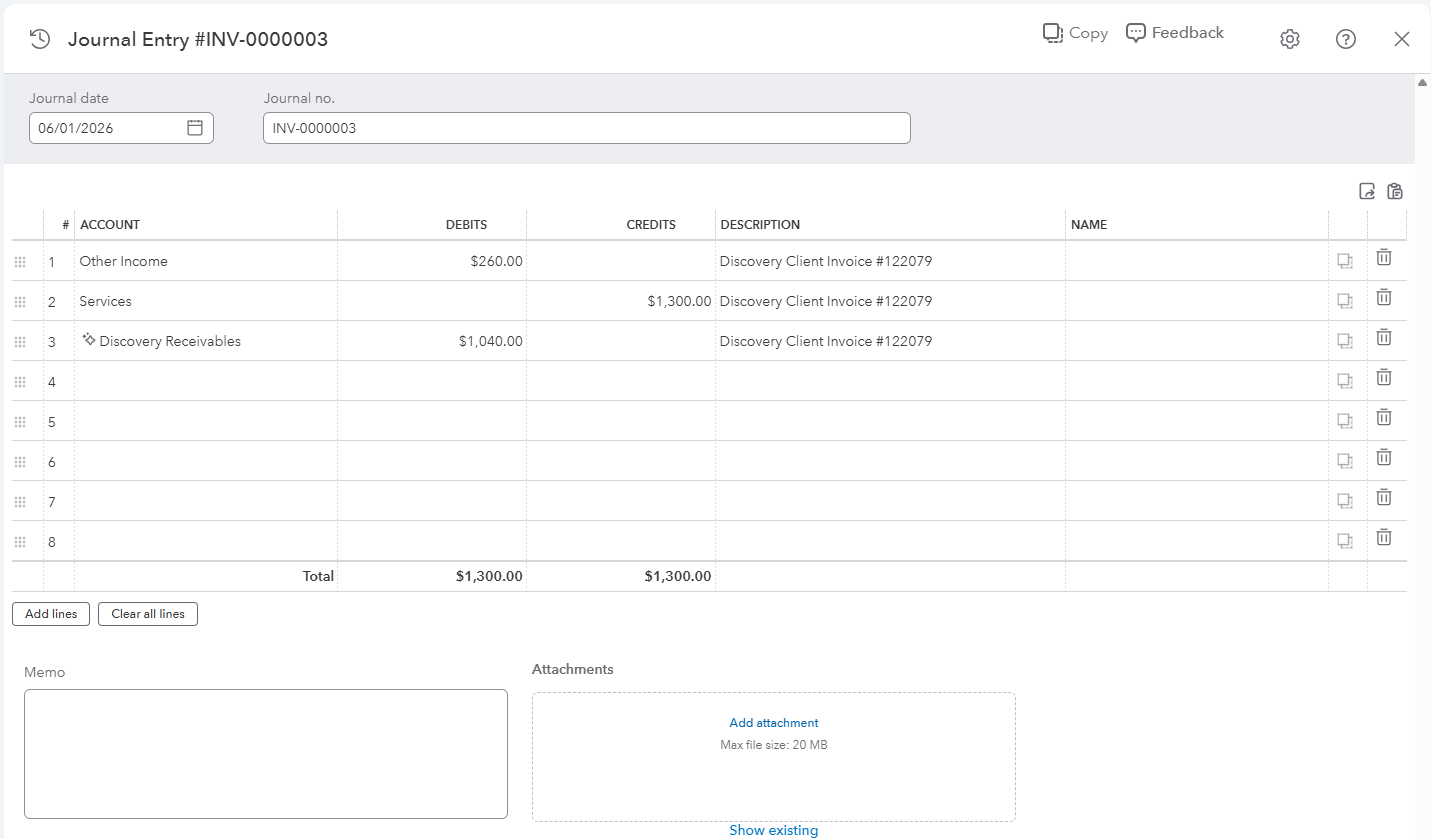
The same journal entry in QuickBooks Online after Send Unposted Entries To Accounting System: same number, date, accounts and amounts. Each line's description is "Discovery Client Invoice #" plus the invoice number.
Invoices sent for the same fiscal period are combined into one journal entry, with one number, until you send journal entries to QuickBooks. Each invoice still has its own lines, labeled with its invoice number.
Before an invoice can be sent, every line item category on it needs a Revenue GL Account, and every sales tax on it needs a GL Account.

If you have additional questions or need more in depth information, please feel free to send us a message using the help beacon in the lower right-hand corner.