
Incident Reason Settings
Owners, Admins, and users whose role has the Settings permission can manage the incident reason settings that are used to populate the Reason drop down menu when creating or editing an Incident. Here's how:
- 1
- Navigate to the Settings screen using the drop down menu under your name.
- 2
-
Select Incidents in the left sidebar navigation and then select the Incident Reasons tab.

- 3
-
On this tab you'll see listing of Incident Reasons that are available for your Tenant. From here, you may follow the Edit link and New button to manage available Incident Reasons.

- 4
-
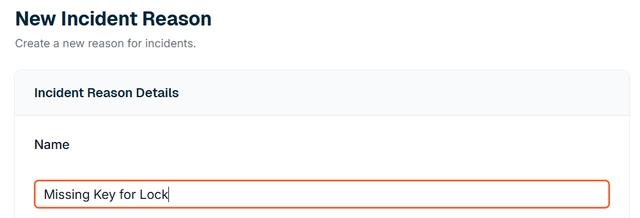
If creating a new reason, the first step is to provide and Incident Reason Name.
- 5
-
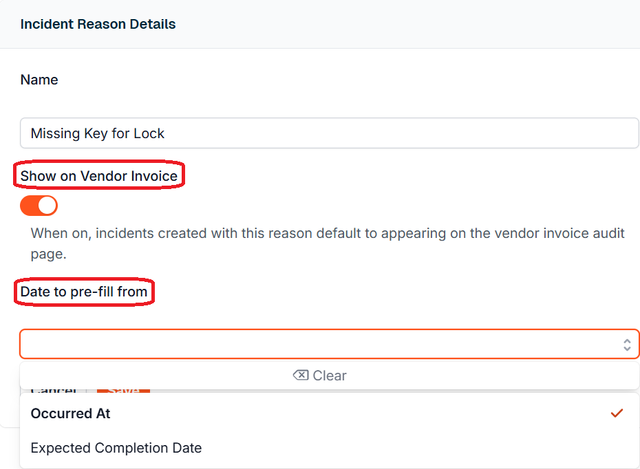
If you would like incidents created with this reason to appear on vendor invoice audit pages by default, turn on the Show on Vendor Invoice toggle* and confirm the Date to pre-fill from.
- 6
- Click the Save button.


*To learn more about the Show on Vendor Invoice setting, see here.

If you have additional questions or need more in depth information, please feel free to send us a message using the help beacon in the lower right-hand corner.